

So how are your basecoating skills so far? Whatever it is I’m pretty sure they are better than mine! Rounding-up this article series, we now move on to dry-brushing, applying a wash, and finally finishing up on our figures! So with that, let’s get right into it!
serpentorslair.info
Drybrushing
To make things simple, the term Drybrushing involves carefully applying a lighter shade of a particular color in order to highlight the “raised areas” of the figure for a nice 3D effect. The process is fairly simple:
- Choose an area that has a lot of raised areas you want “highlighted.” – These can be anything from cloaks to chainmail or the like. Take note of the color that you originally used for that part.
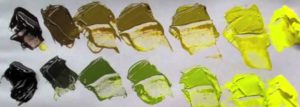
- Mix a lighter shade of that color to be used for drybrushing. – Add a bit of white paint along with the original color that you used on that area. You can have the option of not thinning your paint in this step. Some paints generally suggest lighter shade equivalents in their catalog but for now, mixing the color with white will do.
scalemodelguide.com
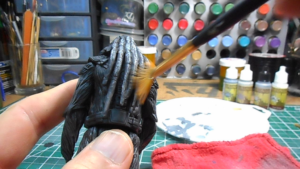
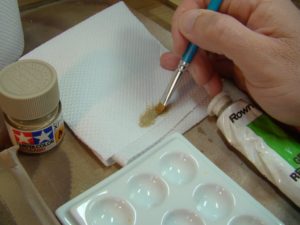
- Putting paint on the brush and “drying it”. – After making the lighter mixture of color, lightly dip the brush and get some paint into the tip. This next part is crucial! – Wipe most of the paint in a dry paper towel. This may seem really counter-intuitive but remember, we are making a “dry brush.” Make sure that the tip is dry with most of the paint removed. Just to double-check, you can run the brush up your wrist a few times too if you want.

You can use a bigger flat brush for drybrushing… Even the old, soon-to-be-discarded ones are good.
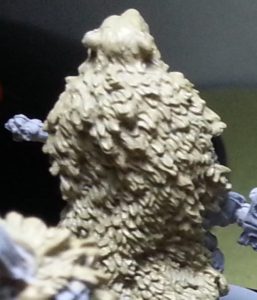
- Run the brush over the raised areas you want highlighted. – Carefully and gently brush the areas that you want to have a lighter shade. The raised parts will naturally pick up some of the dried-up paint to make it stand out. If you have the patience, you can even try to put another layer of drybrush for that eye-popping effect. (Check the video above by SDub)
There you have it for drybrushing! The next part is about Washing. Both of these techniques can be interchanged as you see fit. Like I said before, there is no fixed rule in painting. So don’t be afraid to try out your ideas!

Washes
This is actually my favorite step! Aside from the fact that we are almost done, it’s by far one of the easiest techniques to do!

Washes are basically a thinned/watered down paint of a darker color. They are designed in such a way that they “flow and cling” through the recesses, cracks and crevices on the figure; Giving them some shade and definition.
What type of wash might vary depending on the color that you are applying it to. I tend to gravitate towards black and light brown washes for most of my figs but I’ll leave it to you to choose.
To apply a wash simply put a small amount of it on the tip of your brush then go through the areas that has a lot of detail on parts that you think shadow would normally lay. You can be liberal in applying this to every part of the figure if you want to or you can target specific areas as you see fit. Either option is fine! Just don’t go crazy in applying the wash. For a more detailed example, check out the video above by BlackKnightGames.

Finishing up.
We are nearly done! At this point you can “clean up” the mini by applying another basecoat to the figure just to cover-up some of the paint on the surface left by the wash. You can even experiment and apply “manual highlights,” just like a drybrushing technique would normally do. As much as I want to discuss about it, I’m very sure that I have not yet arrived on that skill level… A future article perhaps?
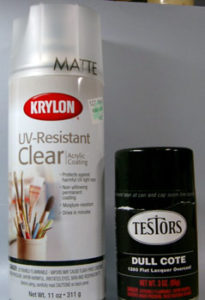
After the paint is completely dry, you might want to protect it by applying a light sealant or varnish just to protect it from the wear-and-tear of gaming. Either a spray-on or brush on works fine. You can even choose from a matte or glossy finish depending on the subject. Just make sure your work area is not too hot, especially on “spray-ons” as it might leave a frosted look.
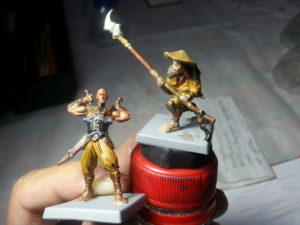
There you go! Thanks for reading all the way through the end! (No seriously, THANK YOU!) Hopefully you found these tips helpful enough to get you started on painting your own minis. I find this hobby as a great way to relax or to cap off of a very stressful day with a very worthwhile activity. It’s really nice to see your minis painted on the gaming table and say… “Yeah I did this!”
Always remember to have fun with it and don’t be afraid to experiment. JUST WING IT!